Scarecrow Amigurumi
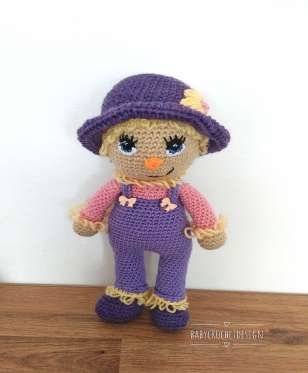
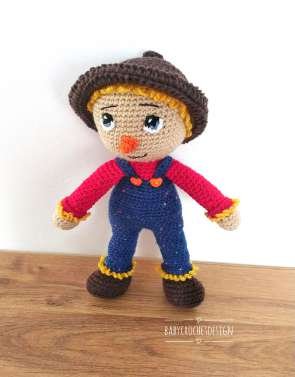
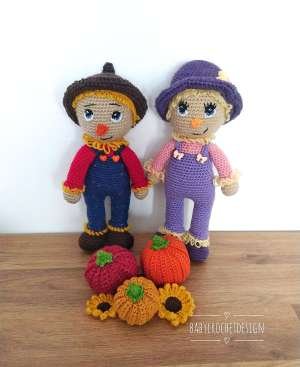
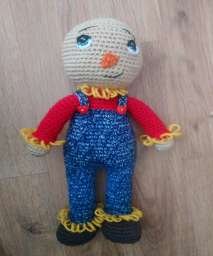
These not so scary Scarecrows are crocheted all in one piece, the legs and arms are crocheted on then continue to the neck, then head. The only pieces to sew on are the hat and trimmings.
The ad free pattern is available as a PDF download here
Written in English US terms with abbreviations for UK
sc=single crochet (double crochet in UK)
hdc=half double crochet (half treble crochet UK)
tc=treble crochet (double treble UK)
dec=invisible decrease (sc 2 stitches together using invisible decrease) (double crochet 2 stitches together UK)
inc=increase (2 sc in next stitch) (2 dc in next stitch UK)
Blo=back loops only
Flo=front loops only
mc=magic circle
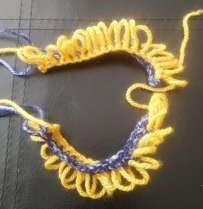
Loop stitch
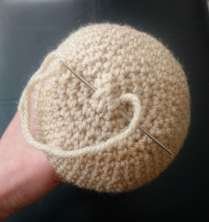
Insert the hook in the next stitch, grab the strand of yarn from behind your index finger, and draw the yarn through the stitch. The yarn on your finger becomes the loop.
With the yarn loop still on your index finger, yarn over the hook and draw the yarn through the 2 loops on your hook.
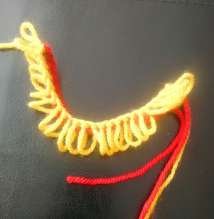
Make sure that all the loops are the same length in order to achieve a finished look. Video
Materials
Around 30g of skin colour dk yarn
50g of contrasting colours
2.5mm hook
A 1.5mm hook and small amount of black and white embroidery thread or 4ply yarn for the eyes or you can use 10mm safety eyes
Polyester toy filling
Needle
All parts are made going around in a spiral apart from feet, boots and trimmings.
Scarecrow will measure approx 12 inches tall, however size will depend on yarn and hook size used.
Arms
Make two starting with skin colour
Stuff as you go
Round 1: 6 sc in mc. (6)
Round 2: *inc* x 6. (12)
Round 3: *sc 1, inc* x 6. (18)
Round 4-5: sc all. (18)
Start stuffing and continue throughout.
Change to shirt colour
Round 6: *sc 1, dec* x 6. (12)
Round 7-22: sc all. (12)
Fasten off and stuff.
Neck support
Make with the shirt colour
Stuff as you go
Round 1: 6 sc in mc. (6)
Round 2: *inc* x 6. (12)
Round 3: *sc 1, inc* x 6. (18)
Round 4-18: sc all. (18)
Stuff firmly and fold the top in half and sc across 9 stitches, fasten off leaving a long end to sew inside the neck.
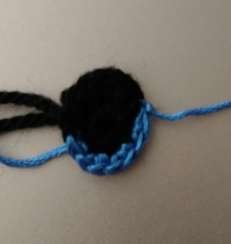
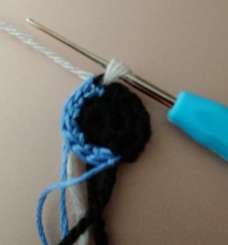
Eyes
Using 1.5 hook and embroidery thread or 4ply yarn
Starting with black
Round 1: 6 sc in a magic circle, slst to first. (6)
Round 2: ch1, 2 sc in the same, 2 sc in each of the next 2, join blue and 2 sc in each of the next 3, slst to first. (12)
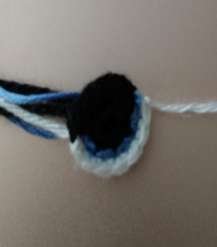
Round 3: join white at the other side at the beginning of the blue, ch1, sc across the blue part and slst into the first black and fasten off.
Sew two small white lines at the top black of each eye, sew in ends leaving a long white and a long black one for sewing onto the scarecrow later.
Nose
With orange
Round 1: Ch4, sc in second ch from hook, sc 2. (3) Turn
Round 2: Ch1, sc in base of ch1, dec. (2) Turn
Round 3: Ch1, dec. (1)
Fasten off.
Legs
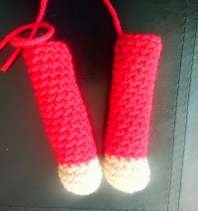
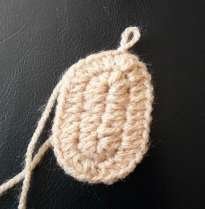
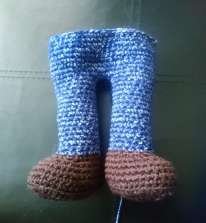
Make two starting with brown for shoes
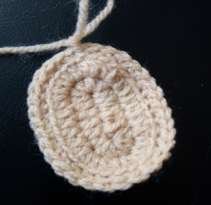
Round 1: ch8, 3 hdc in third chain from hook, 1 hdc in the next four, 6 hdc in last chain then working along other side, 1 hdc in each of the next four, 3 hdc in the last, slst to first. (20)
Round 2: ch1, 1 hdc in the same stitch as ch1, 2 hdc in next two, 1 hdc in next five, 2 hdc in each of the next six, 1 hdc in next five, 2 hdc in each of the next two, slst to first. (31)
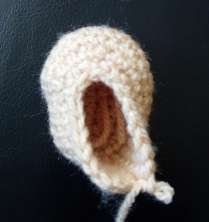
Round 3: ch1, sc in same and next 30 all in back loop only, slst to first. (31)
Round 4-6: ch1, sc in same and next 30, slst to first. (31)
Round 7: ch1, sc in same and next 8, *dec* 6 times, sc 10 slst to first. (25)
Round 8: ch1, sc in same and next 5, *dec* 7 times, sc 5. (18)
Change to trouser colour
Start stuffing and continue throughout.
Now working in continuous rounds
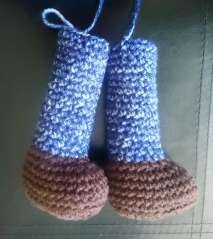
Round 9-24: sc all. (18)
Fasten off the first leg and continue with the second to start the body.
Body
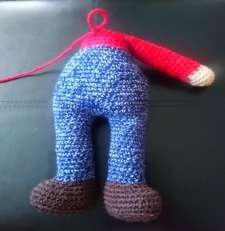
Round 1: ch2, join to the first leg, by sc around 18 of the first leg, sc in both chains, sc 18 around the next leg and both chains. (40)
Round 2: *sc, 5, inc* x 6, sc 4. (46)
Round 3: *sc 22, inc* x 2. (48)
Round 4-11: sc all. (48)
Round 12: *sc 6, dec* six times. (42)
Start stuffing and continue throughout.
Round 13: sc all. (42)
Round 14: *sc 5, dec* six times. (36)
Round 15-17: sc all. (36)
Round 18: *sc 4, dec* six times. (30)
Round 19-20: sc all. (30)
Change to shirt colour
Round 21: sc all. (30)
Round 22: *sc 3, dec* six times. (24)
Round 23: sc to centre back ready for attaching arms. (24)
Attaching arms
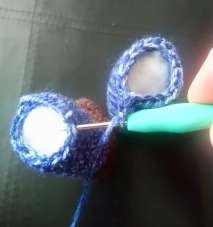
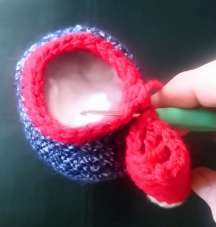
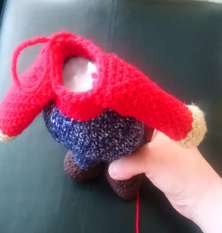
Fold arms in half and sc through the front and back of the arms and body.
Round 24: sc 2, sc 6 through the arm and body, sc 5, sc 6 through the arm and body, sc 5. (24)
Round 25: *sc 2, dec* x 6. (18)
Round 26: sc all. (18)
Change to skin colour.
Round 27: sc all. (18)
Keep stuffing as you go, continue with the head.
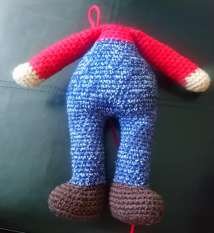
Head
Round 1: *inc* x 18 (36)
Round 2: *sc 5, inc* x 6. (42)
Round 3: *sc 6, inc* x 6. (48)
Round 4-16: sc all. (48) Place marker for eyes between rnd 11 and 12
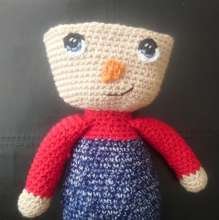
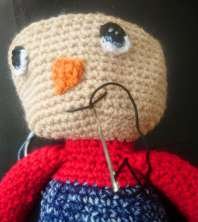
Sew the eyes or fasten the safety eyes between rnd 11 and 12 with 6 stitches between the eyes. Sew the nose in place and sew a mouth.
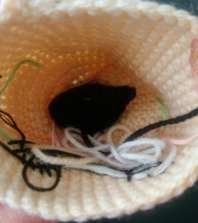
Insert the neck support half down the neck and half in the head, sew in place, then stuff and continue stuffing throughout.
Round 17: *sc 6, dec* x 6. (42)
Round 18: sc all. (42)
Round 19: *sc 5, dec* x 6. (36)
Round 20: *sc 4, dec* x 6. (30)
Round 21: Sc all. (30)
Round 22: *sc 3, dec* x 6. (24)
Round 23: *sc 2, dec* x 6. (18)
Round 24: *sc 1, dec* x 6. (12)
Round 25: *dec* x 6. (6)
Fasten off leaving a long end for sewing and close up, sew some eyebrows.
Collar
With shirt colour.
Ch25, sc in second ch from hook, sc 23. (24)
Fasten off.
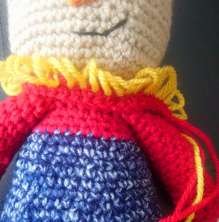
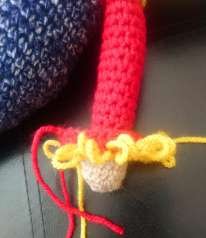
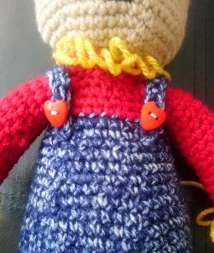
Join yellow and loop stitch across all stitches. Fasten off and sew around the neck.
Sleeve Cuffs
Make two starting with shirt colour.
Ch14, sc in second ch from hook, sc 12. (13)
Fasten off.
Join yellow and loop stitch across all stitches. Fasten off and sew around the sleeve cuffs.
Trouser Cuffs
Make two starting with trouser colour.
Ch21, sc in second ch from hook, sc 19. (20)
Fasten off.
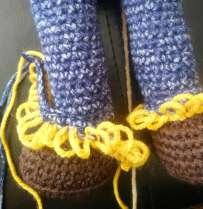
Join yellow and loop stitch across all stitches. Fasten off and sew around the trouser cuffs.
Trouser Straps
Make two using trouser colour.
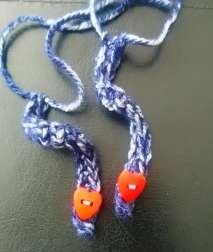
Ch18, sc in second ch from hook sc 16. (17)
Fasten off and sew a button on each one before sewing over the shoulders.
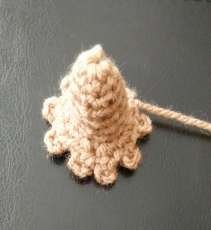
Hat
Round 1: 6 sc in mc. (6) continue to round 7 for girl hat
Round 2-6: sc all. (6)
Round 7: *inc* x 6. (12)
Round 8: *sc 1, inc* x 6. (18)
Round 9: *sc 2, inc* x 6. (24)
Round 10: *sc 3, inc* x 6. (30)
Round 11: *sc 4, inc* x 6. (36)
Round 12: *sc 5, inc* x 6. (42)
Round 13: *sc 6, inc* x 6. (48)
Round 14-18: sc all. (48)
Round 19: *sc 7, inc* x 6. (54)
Round 20: in flo *sc 8, inc* x 6. (60)
Round 21: *hdc 9, inc* x 6. (66)
Round 22: *hdc 10, inc* x 6. (72)
Round 23: *hdc 8, inc* x 9, slst to next and fasten off with a long end.
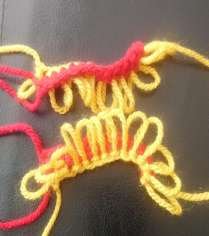
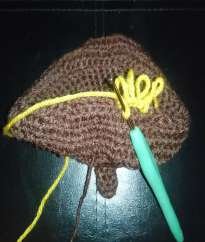
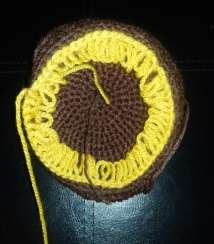
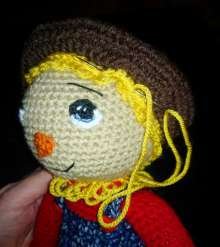
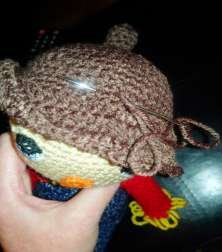
With the top of the hat facing, join yellow yarn and loop stitch around the blo from rnd 20, fasten off with a long end and place on the head, pull the loops down and sew around the yellow, then sew around the brown to secure.
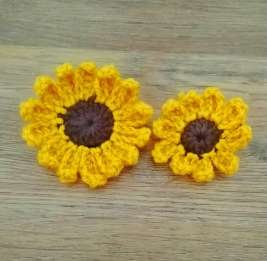
Sunflower
Small
With brown 10 hdc in mc, slst to first. (10)
Join yellow, ch5, hdc in third ch from hook, hdc in next 2, slst to base of stitch, slst to next and repeat 9 more times.
Fasten off.
Large
With brown 15 dc in mc, slst to first. (15)
Join yellow, ch6, hdc in third ch from hook, hdc in next 3, slst to base of stitch, slst to next and repeat 14 more times.
Fasten off.
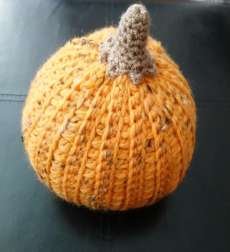
Pumpkin
Small / medium / large
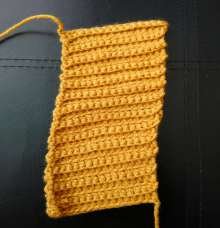
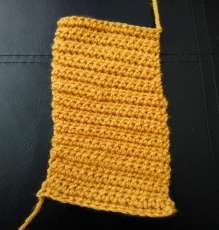
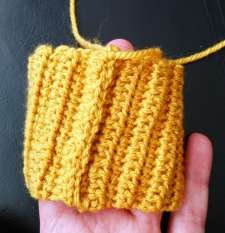
Row 1: ch17 / 21 / 25, sc in 2nd ch from hook, sc across. (16 / 20 / 24)
Row 2: ch1, hdc all in blo. (16 / 20 / 24) Turn
Row 3: ch1, sc all in flo. (16 / 20 / 24) Turn
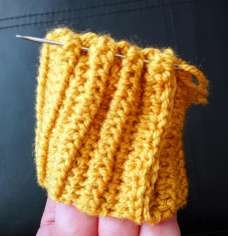
Repeat rows 2 and 3 until 26 / 32 / 36 rows have been worked.
Stalk
With green or brown
Round 1: 6 sc in mc. (6)
Round 2-3: sc all. (5)
Round 4: *sc, ch3, sc in base of ch3, sc* in each stitch.
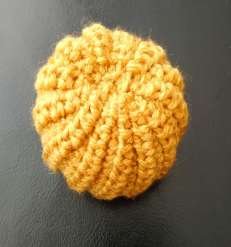
Fasten off and sew on top of the pumpkin.
Each side has a different texture so you can have it which way you like.
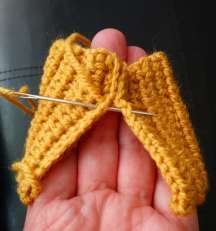
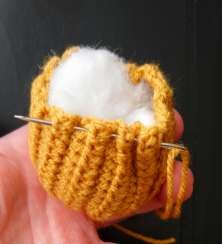
Fold in half and sew from the inside, turn the right way round, weave yarn all the way round the bottom of the pumpkin and pull tight and sew to secure.
Stuff and weave yarn around the top, pull tight and sew to secure.
I hope you enjoyed making my pattern!
II would love to see your makes feel free to share #scarecrowamigurumi @babycrochetdesigns Instagram, Pinterest and Facebook.
Visit my website at www.babycrochetdesigns.com for free patterns and new patterns coming soon.
*COPYRIGHT © 2024 This pattern is made for personal use only. My patterns may not be used in any tutorials. You may not copy, share or sell this pattern, or use any of my photos. You may make and sell items made from my patterns in moderation but please be kind and credit me in any of your photos or listings @BabyCrochetDesigns as the designer many thanks*
